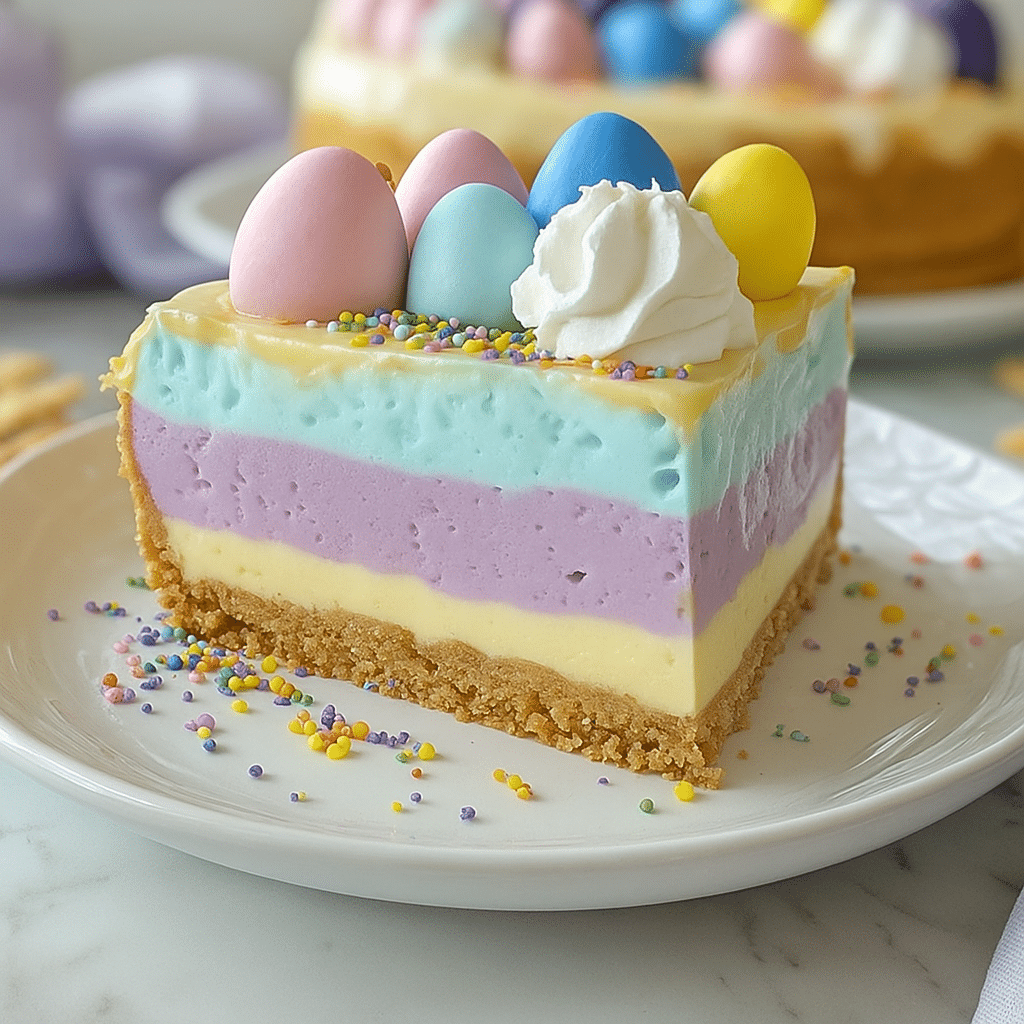
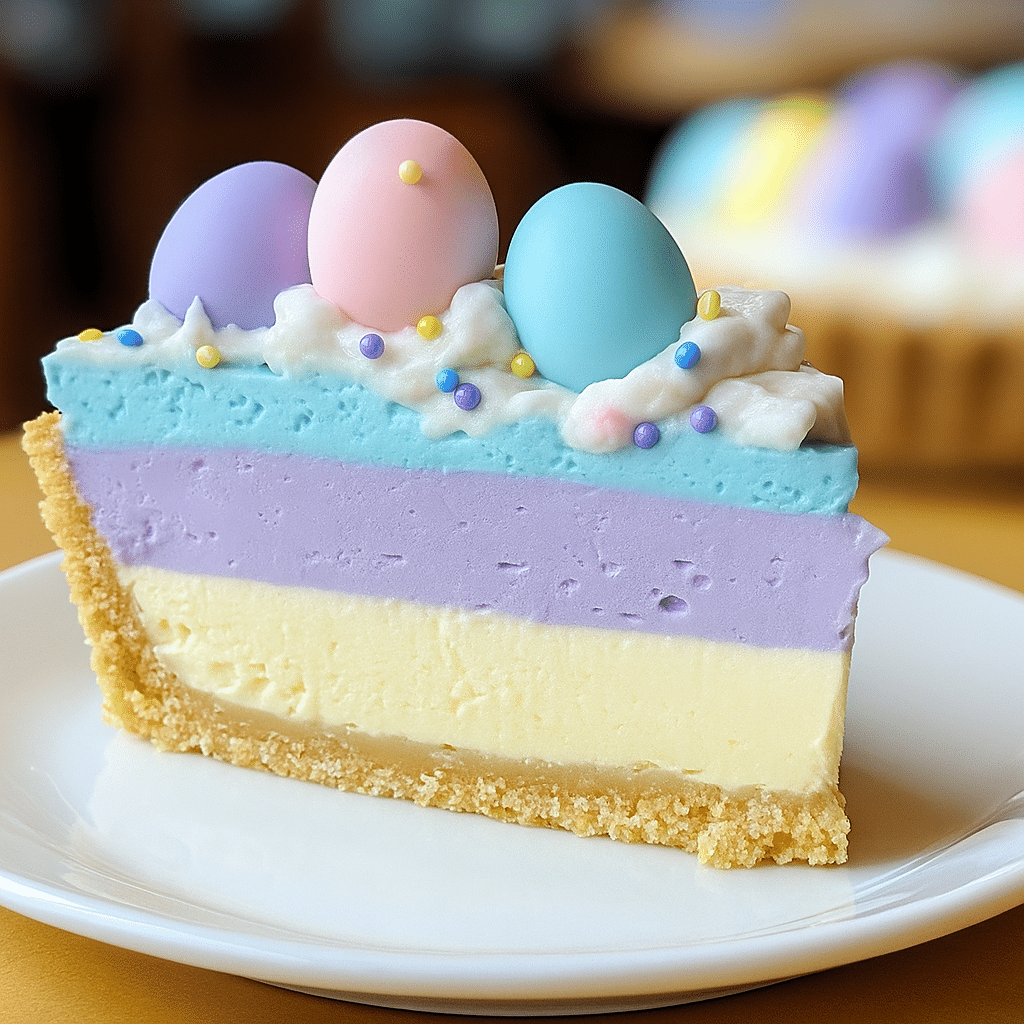
Easter Jell-O pie is one of those nostalgic desserts that takes me straight back to my grandma’s kitchen. I still remember standing on a step stool, carefully pouring pastel-colored layers into a graham cracker crust while she gently reminded me not to rush. The pie looked like a stained-glass window in dessert form — and even though my first version was far from perfect, my family adored it.

Now, years later, this pie has become a spring tradition in my house. There’s just something magical about those soft layers, the creamy texture, and the pop of Easter colors that puts smiles on every face around the table. Whether you’re prepping for a holiday brunch or just craving a no-bake dessert with your coffee, Easter Jell-O pie brings joy with every slice.
Table of Contents
What is an Easter Jell-O Pie?
The Origin and Concept of Easter Jell-O Pie
Easter Jell-O pie is a no-bake dessert made with colorful layers of whipped Jell-O, cream, and a graham cracker crust. It’s light, pastel, and perfect for spring. Inspired by vintage gelatin dishes, this updated version adds a creamy texture and dreamy look — making it feel nostalgic and modern at the same time.
Originally popular in the mid-1900s, Jell-O desserts were a staple at family gatherings. Over time, they faded from trend, but now they’re making a comeback thanks to their ease, beauty, and family appeal.
Why Easter Jell-O Pie is Gaining Popularity Again
Today, layered Jell-O pies are all over spring tables — and for good reason:
- No baking required
- Customizable flavors and colors
- Fun for kids to help with
- Bright and festive for Easter
Whether it’s the creamy texture or the candy-colored layers, this dessert is winning hearts again — one slice at a time.
Key Ingredients That Make This Pie Perfect
Choosing the Best Jell-O Flavors for Visual and Taste Impact
The magic of an Easter Jell-O pie lies in the color layering. Go for pastel shades that pop: lemon (yellow), berry blue, and pink Starburst or strawberry. These not only create that signature Easter palette, but also balance sweet and tart flavors.
To make the colors more vibrant, especially for the yellow and pink layers, just add a drop or two of food coloring. It’s a simple trick that makes your layers shine.
Whipped Cream vs. Cool Whip: Texture and Taste
Both work, but Cool Whip holds better for layering and sets more firmly. Whipped cream gives a fresher taste but can soften faster. Use what suits your texture preference — either way, it creates that light mousse feel when blended with the Jell-O.
Each Jell-O layer mixes with whipped topping to create a creamy, almost custard-like bite that melts in your mouth.
The Graham Cracker Crust: Homemade vs. Pre-Made
Making your own crust takes 5 minutes: mix graham crumbs with melted butter, press into a pan, and chill. It gives a thicker, crunchier base that holds up under the layers.
Pre-made crusts work in a pinch but go for a deep-dish version, or reduce the filling slightly. Don’t forget to freeze the crust before pouring your first layer — it prevents sogginess.
Looking for inspiration? Try our cookies and cream protein cookies for a fun dessert twist to serve alongside your Jell-O pie.
These few ingredients — when chosen well — make all the difference between a good pie and an unforgettable one.
How to Make Easter Jell-O Pie Step by Step
Preparing the Crust for Best Structural Hold
Start with your crust — it’s the foundation. Mix graham cracker crumbs with melted butter until the texture feels like wet sand. Press it firmly into the bottom and sides of a springform pan. Freeze it for at least 10 minutes to lock it in place.
This step ensures your crust stays crisp, even after adding the creamy Jell-O layers.
Mixing Jell-O and Cream for Silky Smooth Layers
In separate bowls, mix each Jell-O flavor with boiling water, then cold water. Chill slightly — you want it thickened but not fully set.
Next, fold in whipped cream or Cool Whip until smooth and pastel-colored. If needed, use food coloring to boost brightness. The mixture should look airy, not runny.
Tip: Softened cream cheese can also be added if you want a richer texture — just be sure to whisk until no lumps remain.
Layering Colors: Patience and Precision Techniques
Add one layer at a time into the crust, starting with the lightest color (like yellow) for the best visual effect. Pour gently over the back of a spoon to avoid disrupting the layer beneath.
Freeze each layer for 5 minutes before adding the next. Repeat this until all layers are stacked.
Once finished, freeze the entire pie for 3–4 hours or until firm. Then transfer to the fridge to soften slightly before serving.
When made with care and patience, Easter Jell-O pie turns into a creamy, layered showstopper — and the process is just as fun as the result.
Tips to Nail the Texture, Layers & Presentation
How Long to Chill Each Layer for Clean Separation
Timing is everything when making Easter Jell-O pie. Chill each Jell-O layer for at least 30 minutes in the fridge or 5–10 minutes in the freezer before pouring the next. Rushing leads to layers blending together — which ruins the signature look.
Set a timer. It’s better to wait a few minutes longer than to risk a messy pie.
Using Softened Cream Cheese Without Clumps
If you’re adding cream cheese, make sure it’s truly soft — let it sit at room temperature for about an hour. Cold cream cheese won’t mix well and can leave visible white clumps in your pastel layers.
Whisk or blend it with warm Jell-O until smooth before adding whipped topping. This step helps achieve that mousse-like texture in each bite.
Avoiding Common Mistakes Like Layer Bleeding or Cracking
To keep each layer distinct and even:
- Pour gently: Use the back of a spoon to diffuse the pour and protect the layer below.
- Don’t over-freeze: Let the previous layer firm up but not harden like ice.
- Trim the wait: Too long between layers can cause drying and cracking.
If you accidentally dent a layer, smooth it with a warm spoon before adding the next.
Finally, refrigerate the whole Easter Jell-O pie overnight for best results. It will slice better, hold shape, and have a chilled, creamy finish.
Decorating Your Easter Jell-O Pie Like a Pro
Best Easter Toppings: Jelly Beans, Mini Eggs, Edible Glitter

Once your Easter Jell-O pie is chilled and set, it’s time for the fun part — decorating. This pie already has eye-catching layers, so your toppings should add to that without overwhelming it.
Try these festive favorites:
- Mini chocolate eggs for a classic Easter look
- Jelly beans to add color and texture
- Pastel sprinkles or edible glitter for sparkle
- Shredded coconut dyed green to mimic grass
Less is more. Focus toppings around the edge or in the center to avoid covering up those beautiful layers.
When and How to Add Whipped Topping for Perfect Finish
Add your whipped topping right before serving for the best texture. If added too early, it can melt or slide off in the fridge.
Pipe it using a star tip for a bakery-style finish, or spread a thin layer on top and build a small swirl in the center. Want to keep it simple? Just add a clean dollop with a spoon and top with one candy egg.
Adding that finishing touch gives your Easter Jell-O pie a polished, party-ready look that gets compliments before the first bite.
Fun Variations You Can Try
Different Flavor/Color Combos for Other Holidays
The beauty of an Easter Jell-O pie is how easily it transforms to fit any occasion. Switch up your Jell-O flavors to match other holidays or color themes:
| Holiday | Jell-O Colors | Ideas |
|---|---|---|
| Spring | Lemon, Blue Raspberry, Strawberry | Classic Easter pastels |
| 4th of July | Cherry, Blueberry | Patriotic layers |
| Halloween | Orange, Grape | Add candy eyeballs on top |
| Christmas | Lime, Cherry | Decorate with crushed candy canes |
Each swap gives you a whole new pie without changing the base technique. Just be sure to pair colors that complement each other when sliced.
Mini Pies in Jars or Cups
Hosting a party or potluck? Try serving your layered Jell-O pie in mason jars or clear cups. It’s perfect for individual portions and lets everyone admire the layers before digging in.
You can also:
- Create a “pie bar” with different flavor combos
- Add custom labels or ribbon for gifting
- Layer in crushed cookies or chocolate crusts for variety
These mini versions chill faster too — so they’re great when you’re short on time.
Using Alternative Crusts Like Chocolate or Gluten-Free
Don’t be afraid to experiment with the crust:
- Use chocolate graham crackers for a richer taste
- Swap in gluten-free cookies for allergy-friendly options
- Add shredded coconut for a tropical twist
Even a cookie crust made from crushed Oreos or Biscoff works beautifully with the sweet layers of this pie.
With just a few tweaks, your Easter Jell-O pie becomes a year-round dessert canvas.
Serving, Storing & Shelf Life Tips
How to Get Clean Slices: The Hot Knife Trick
You’ve put effort into those beautiful pastel layers — don’t ruin them while slicing. The best way to get clean, sharp pieces of Easter Jell-O pie is with the hot knife method.
Here’s how:
- Dip a thin knife in hot water
- Wipe it dry before slicing
- Repeat between each cut
Use a pie server with a narrow edge to lift each slice cleanly without cracking the crust. Take your time — the layers will thank you.
Can You Freeze Jell-O Pie? Storage Dos and Don’ts
Do not freeze your Easter Jell-O pie. Freezing affects the gelatin’s texture, causing it to separate or turn watery once thawed.
Here’s what to do instead:
- Store in the fridge, covered, for up to 4 days
- Keep whipped topping separate if storing in advance
- Use an airtight container or wrap tightly with plastic wrap
Avoid storing next to strong-smelling foods like onions — Jell-O absorbs odors easily.
Check out our 3-ingredient protein powder mug cake for another quick sweet fix that stores well too.
How Long Can It Stay in the Fridge and Still Taste Fresh?
If kept cold and sealed, Easter Jell-O pie stays fresh for 3 to 4 days. After that, the texture may start to soften and the layers can lose their shape.
For best results:
- Make it 1 day before serving
- Add toppings just before presentation
- Slice only what you plan to eat — re-sliced edges dry faster
Whether serving after brunch or as a late-night sweet bite, this pie holds its charm best within the first few days.
Why This Recipe Works for Any Age Group
Why Kids Love the Visual Appeal and Soft Texture
From the moment you slice into an Easter Jell-O pie, it’s a feast for the eyes — and kids love that. The pastel colors and bouncy, creamy texture make it look almost magical, like a dessert from a fairy tale.
Children are drawn to:
- Bright, playful layers
- Whipped, mousse-like consistency
- Sweet flavors that aren’t too rich or heavy
It’s also fun for little hands to help layer and decorate. Letting them add sprinkles or Easter candies gives them a sense of ownership — and excitement to eat their creation.
How It Connects Older Generations with Tradition
For adults and grandparents, Easter Jell-O pie stirs up memories. It’s a modern nod to the gelatin molds served at family gatherings decades ago.
The difference? This version is easier, prettier, and lighter — but still taps into that feeling of home and tradition.
It’s the perfect dessert for bridging generations:
- A new classic that feels nostalgic
- Light enough to serve after big meals
- Simple ingredients everyone recognizes
The Perfect Light Dessert After Heavy Easter Meals
Easter meals can be rich — ham, casseroles, and buttery rolls fill the table. That’s where this pie shines. It finishes the feast with:
- A cool, creamy contrast
- Fruity flavor that refreshes the palate
- No heaviness, just sweetness and satisfaction
CONCLUSION
Easter Jell-O pie isn’t just a dessert — it’s a colorful, joyful centerpiece that blends nostalgia with modern creativity. Its creamy texture, bright layers, and no-bake simplicity make it the ultimate spring treat, whether you’re hosting Easter brunch or surprising your family with something sweet and stunning.
Easy to make and impossible to forget, this pie proves that even the most playful recipes can leave lasting memories. One slice and you’ll understand why it’s making a delicious comeback.
Get more sweet inspiration and behind-the-scenes tips—join us on Facebook and save your favorite recipes on Pinterest to try later!
Frequently Asked Questions About Easter Jell-O Pie
Why is Jell-O no longer popular?
Jell-O desserts were once a staple of mid-century American kitchens, but trends shifted toward more artisanal and health-focused desserts. However, Easter Jell-O pie has helped revive gelatin-based treats thanks to its fun, modern twist and visual appeal. Today, many home cooks are rediscovering Jell-O’s potential in layered, creamy, no-bake desserts.
Can you put Jell-O in a pie crust?
Absolutely — and that’s exactly what makes Easter Jell-O pie special. When combined with whipped topping (and optionally cream cheese), Jell-O transforms from a jiggly gelatin to a mousse-like filling that sets beautifully in a graham cracker crust. Just be sure to chill each layer before adding the next for the best results.
What is Easter pie called?
Traditionally, “Easter pie” refers to savory Italian dishes like Pizza Rustica, but in modern baking, Easter Jell-O pie has become a beloved sweet version. It’s layered, colorful, and light — perfect for balancing out a rich holiday meal. Plus, it’s a kid-friendly favorite that brings joy to any spring table.
How long does peanut butter pie last in the fridge?
Like Easter Jell-O pie, a peanut butter pie typically lasts 3 to 4 days in the fridge when properly covered. The key is to store it airtight and keep it away from strong odors. Over time, the texture can soften, so it’s best enjoyed fresh within the first few days.
Is it okay to add food coloring to Jell-O layers?
Yes — and it’s often recommended. Some Jell-O flavors like lemon or strawberry can appear pale after whipping. A drop or two of food coloring helps brighten the pastels and enhances the presentation of your Easter Jell-O pie without affecting flavor.
What’s the best way to make it ahead of time?
You can prep your Easter Jell-O pie a day in advance. Layer everything, let it chill overnight, and add toppings right before serving. This gives the pie time to firm up fully and makes slicing much cleaner.

The Best Easter Jell-O Pie Recipe for Spring Parties
- Total Time: 4 hours 30 minutes
- Yield: 8 slices 1x
Description
A nostalgic no-bake Easter Jell-O pie with creamy pastel layers, perfect for spring parties and holiday brunch tables.
Ingredients
- 1 pre-made or homemade graham cracker crust
- 1 box lemon Jell-O
- 1 box berry blue Jell-O
- 1 box pink Starburst or strawberry Jell-O
- 3 cups boiling water (1 cup per flavor)
- 3 cups cold water (1 cup per flavor)
- 1 tub Cool Whip or 2 cups whipped cream
- Optional: food coloring to enhance pastel tones
- Optional: 4 oz softened cream cheese for richer texture
- Mini chocolate eggs, jelly beans, pastel sprinkles, or edible glitter for decoration
Instructions
- Prepare graham cracker crust by mixing crumbs with melted butter, pressing into a springform pan, and freezing for 10 minutes.
- In separate bowls, mix each Jell-O flavor with 1 cup boiling water and 1 cup cold water. Chill until slightly thickened but not set.
- Fold in whipped cream or Cool Whip into each Jell-O mixture. Add food coloring if needed to brighten colors.
- Pour the first layer gently into the crust using the back of a spoon. Freeze for 5–10 minutes until set.
- Repeat with remaining layers, allowing each to firm up slightly before adding the next.
- After all layers are added, freeze the entire pie for 3–4 hours, then transfer to the fridge to soften before serving.
- Before serving, decorate with whipped topping and your choice of Easter-themed toppings.
Notes
For clean slices, use the hot knife method: dip a knife in hot water, dry it off, and slice carefully. Refrigerate and consume within 3–4 days.
- Prep Time: 30 minutes
- Cook Time: 0 minutes
- Category: Dessert
- Method: No-Bake
- Cuisine: American
Nutrition
- Serving Size: 1 slice
- Calories: 280
- Sugar: 22g
- Sodium: 190mg
- Fat: 12g
- Saturated Fat: 8g
- Unsaturated Fat: 3g
- Trans Fat: 0g
- Carbohydrates: 36g
- Fiber: 0g
- Protein: 3g
- Cholesterol: 15mg